Installing the Air Conditioning
The air-conditioning compressor on the original 4cyl engine was completely flogged out at the time of doing the engine conversion. I decided that installing the compressor from the Camry would be a better bet anyway as it's a larger unit and would work a little better at cooling anyway.
The air-con was degassed before the removal of both engines at the start of the conversion. I took all of the A/C lines from both the rav and camry into a local auto electrician and got them to disconnect the fittings from both sets. They gave me new lines to fit up to the compressor & the lines going back through the firewall, but left the fittings at one end loose so I could figure out where to route them.
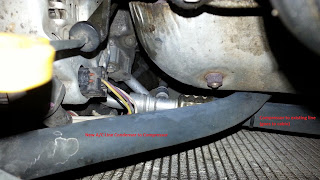
I ended up routing the line from compressor to cabin over the top of the cooling fan as there was just no space anywhere else. The engine mount was in the way down the bottom and cooling fan shroud covered everywhere else.
u
The tightening pulley on the alternator was removed when the engine was installed as there was not enough room for it. The accessory belt now just loops around the driveshaft pulley, alternator & A/C compressor and I've tightened it up as tight as possible to avoid slip without the extra pulley.
The result was a success with the wife very happy that the Rav now has Air-Con. Without it was really unpleasant to drive in summer and now I drive it all year round.
Next up..... Rear Disc Brakes!


Awesome dude. I'm rying to get my parts together. I'm using your RAV4 as a guide. But my RAV4 is the USA type. here is my page. http://www.cardomain.com/ride/400637
ReplyDeleteI'm known as mensajero in RAV4world.com
Very Nice. From the looks of it yours is only FWD? as you've got the exhaust going through the rear diff subframe under the back of the car. If that's the case, then you don't need to worry about the transfer case which will make yours a much simpler conversion. Over there you'd be better off doing a 1MZ conversion as they are much easier to come by and you've got the option of VVTI. Also get hold of a manual trans out of a v6 camry or turbo Celica if you can as they have better gear ratios that are much better suited to the V6 and have much heavier gears. You can see that on the transmission conversion page.
DeleteNice Exhaust! That's what I need on mine.
Thanks man, will keep informing RAV4world.com about your progress. Your project service as inspiration to many of us. Thanks a lot Dude.
ReplyDeleteOK, I'm back. I'm working from Summer to Summer onmy project. That when I go on vacation. Here it is. My RAV4 is a 5 speed OEM. Regarding the electrical system. Do I have to install the same engine computer from the 1MZ-FE engine on my RAV4, or can I use the 3SFE OEM computer to run with the 1MZ-FE engine? What wiring would I need? Since m,y RAV4 is 5 speed, can I use the same clutch and flywheel on the 1MZ-FE engine, or do I have to get the Fidanza aluminum flywheel?
ReplyDeleteHi Mate, 1MZ ECU has to go with teh 1MZ Engine. Basically you just transfer the wiring loom & ECU from the donor car into the Rav, then any of the extra wires that don't connect from the 1MZ ECU to Engine need to be connected to their respective wires in the Rav.
DeleteFor example; Speed, Engine Temp, RPM etc.. wires that come from the ECU or Engine need to go to the dash. You need the wiring diagram or at least ECU pinout from the donor car. I have the Rav wiring diagram, so I'll put a link under the electrical section in "Installing the 3VZ into the Rav"